
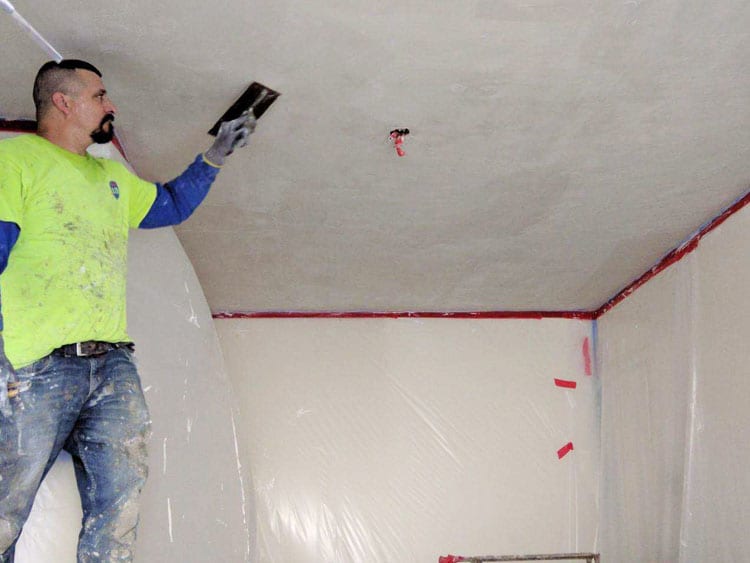
Having your walls up is not the end of the building construction process. If you want to decorate your walls or cover their uneven surfaces, your contractors can finish your building with plaster. Plastering is the process wherein the coarse surfaces of your walls or ceilings are covered to achieve a smooth and aesthetic finish.
There are several types of plaster finish, and in this article, we will tell you how to achieve five different styles. Every finish gives your wall a different appearance, and it’s up to you to choose which one to use in your project.
1. Sand-faced finish
If you want a sustainable base for a wall that you will paint on, finish it with a sand-faced plaster. It is a layer of cement and sand that also serves as sound and thermal insulation.
Make sure to apply two coats of plaster on your wall. The first coat should use a 12mm thick layer of cement and sand. The ratio should be 1:4, respectively. Apply the coat in diagonal lines and then allow it to cure for seven days. The second layer has a different mixture. Use a 1:1 ratio for cement and sand. This time, you’ll use a sponge to level the surface.
Finally, get some sand, then screen and apply it to the second coat using a skimming or wooden flat.
2. Smooth cast finish
If you want your wall to have a similar finish to sand-faced but with fine-grained sand, then smooth cast plaster finish is what your wall needs. It is typically used to coat internal walls.
To achieve this look for your wall, you need a mortar with a ratio of one part cement for every three parts sand. Make sure to use fine sand. When applying the mortar onto the wall, use a skimming float or wood float to get the best effect. That’s how to get a smooth and leveled finish.
3. Roughcast finish
Roughcast plaster provides a more durable and decorative appeal to your wall or ceiling. This finish is also called the spatter dash finish, and it is a mixture of sand and gravel applied over a freshly plastered surface.
You will need a mixture of one part coarse aggregate, one and a half parts of cement, and three parts sand. Make sure to use coarse aggregate with a size of 3 to 12mm.
4. Pebbledash finish
Contractors use this type of wall covering mostly for exterior walls. It uses lime and a sand base on which pebbles are added and pressed. It gives your wall an aesthetic finish with tiny and smooth stones, and some masons consider it as artwork.
To create one, you will need a mortar layer of 12mm thickness. Add a ratio of one part cement for every three parts sand. Plaster the wall with it and then dash it with pebbles of sizes between 10 to 20mm. Then, slowly press the pebbles onto the plastered surface using a wooden float.
5. Scrapped finish
The scrapped finish is usually for a wall’s final coat. Apply a final coat of 6 to 12mm thickness and allow it to dry for several hours.
After the coat is set, you can use a steel straight edge or a saw blade to scrape it. The objective is to remove around 2 to 3mm depth off the surface in a stylized manner. Expect to see a coarse-textured finish as the final result. If you want to achieve a different effect, try using various tools.
Conclusion
Plastering your wall helps you achieve a smooth or hard surface, depending on your preference. It can help you improve your building’s safety and visual appeal. Although we shared a few tips to help you with each finish, plastering requires dedication and experience to achieve what you want for your walls.
If you are looking for plaster contractors in the Bay Area, send us a message at One Stop Plastering. We are experts in plastering for residential and commercial spaces. We also offer one-day patching for people with a tight deadline. Contact us today so we can get the job done.