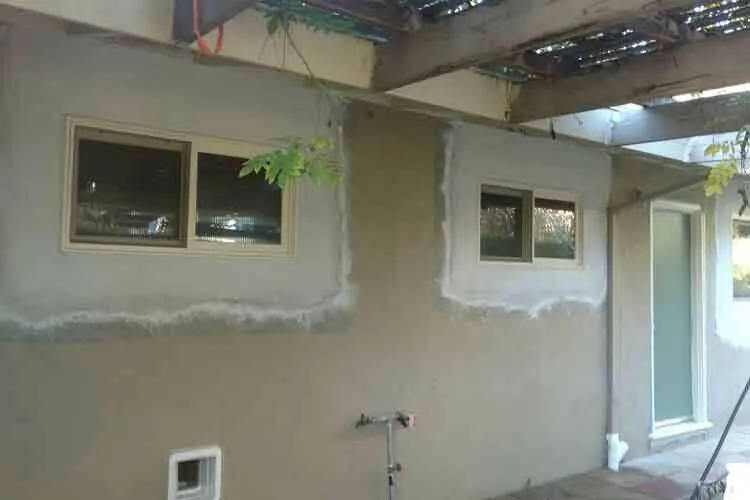
A hole in a stucco wall rarely announces itself as an emergency. Maybe a satellite dish came down and left anchor holes behind. Maybe a corner got clipped by a ladder, or a woodpecker found a soft spot near the eaves. The finish around it still looks solid, so the damage sits there through the dry months without causing any visible trouble.
The problem is what happens once water shows up. Stucco damage that stays dormant all summer becomes an entry point when the rain returns, and water intrusion through openings in the finish can lead to efflorescence, blistering or peeling coatings, and in worse cases damage to the framing behind the wall. A repair that would have been limited to a small patch can grow into something involving the water-resistive barrier, the lath, and the sheathing.
This guide walks through how to size up the damage and choose between the real stucco hole repair options — a simple crack filler, a cut-and-patch repair, or a professional assessment — weighing budget, durability, and timing so the wall is sound before wet weather settles in.
First, Figure Out What You’re Actually Looking At
Not every opening in a stucco wall is the same problem, and the right fix depends on an honest assessment of what’s there. Before pricing anything, look at three things:
- Size and depth. A hairline crack that stays at the surface is a different repair from a hole that punches through the finish and exposes the lath or building paper behind it.
- Location on the building. Damage near windows, doors, parapets, and roof-to-wall intersections matters more, because those are the spots where flashing and the drainage plane have to work together. A hole that interrupts that system lets water bypass the wall’s real defense.
- What’s behind the opening. If you can see torn building paper, rusted or cut lath, or dark staining inside the hole, water has likely already been getting in.
It also matters what the wall is made of. Stucco is brittle by nature and some cracking is normal — cracks can come from shrinkage shortly after application or from stress transferred by the structure. But older Northern San Francisco Bay Area buildings add a wrinkle: Portland cement became common in stucco after 1900, with no precise cutoff, so a late-19th or early-20th-century wall may be lime-based rather than cement-based, often patched over the decades with cement.
Option One: Sealant-Type Fixes for Hairline Cracks
The lowest-cost path applies only to the smallest damage. Under repair guidelines for Portland-cement stucco, cracks no wider than 1/32 inch can be cleaned, sealed with a flexible acrylic crack filler tooled flush with the brown coat, and then finished to match the surrounding texture and color. Proprietary acrylic non-sag fillers are made for hairline cracks up to 1/8 inch wide on vertical stucco surfaces — those are manufacturer products, so their instructions govern.
Where this option wins on budget, it loses fast on scope. A crack filler is for cracks. It is not a stucco hole repair. If the opening goes through the finish, exposes lath, or has any depth to it, filling the surface just hides the path water is taking into the wall. Cracks warrant real repair when they’re unsightly or when they let in enough water to cause deterioration — and a true hole almost always clears that second bar.
Recommendation: use flexible crack filler only for genuine hairline surface cracks on cement stucco. Anything you could fit a pencil into deserves the next option.
Option Two: A Proper Cut-and-Patch Repair
For actual holes in exterior cement stucco, the durable fix is to cut back the damaged material and rebuild the wall assembly in that area. Done correctly, this is more than smearing patch compound into the void. A sound repair follows a few field rules:
- Square up the patch. Damaged stucco gets removed so the patch is square or rectangular, avoiding re-entrant corners and shapes with a length-to-width ratio greater than 2.5:1 — irregular patch shapes concentrate stress and invite new cracking.
- Restore what’s behind the finish. Where lath is cut to make the repair, replacement galvanized lath gets wire-tied to the surrounding lath, and the water-resistive barrier — Grade D asphalt-saturated kraft paper under ASTM D226 — gets lapped correctly with adjacent paper and flashing. Stucco isn’t a watertight skin on its own; the drainage plane behind it is what keeps water off the sheathing, and a patch that skips it fails quietly.
- Cure the patch. A cement basecoat patch is finished even with the adjacent stucco and moist cured. Proprietary patch materials exist too, and for those the manufacturer’s instructions control.
This option costs more than a tube of filler, and it should. It’s the only approach that actually restores the wall system rather than the surface. One honest caveat on appearance: getting a perfect color and texture match is very difficult, and an isolated repair, though functionally effective, may stand out from the rest of the wall. Skilled finish work narrows that gap; nothing eliminates it entirely on every wall.
Recommendation: for any hole that penetrates the finish, cut-and-patch with proper lath tie-in and barrier lapping is the repair worth paying for.
Weigh Weather and Timing Honestly
Cement stucco is weather-sensitive material, and that affects planning more than most people expect. Traditional three-coat work runs on coat intervals: a scratch coat cures at least 24 hours, a brown coat dries at least 24 hours, and with each coat taking 24 to 48 hours to cure, multi-coat repairs can add days to a project. Those are intervals between coats, not a whole-project schedule — actual timing depends on scope, product instructions, and site conditions.
Temperature matters too. Traditional cement stucco wants ambient conditions between 40°F and 90°F; too cold and the water won’t cure out of the cement, too hot and it dries too fast and cracks, which is why crews sometimes fog-spray in hot weather. Good repair practice also calls for leaving the work weather-tight at the end of each shift, or allowing enough time to protect it until work resumes.
When a Professional Assessment Is the Right First Move
Some situations shouldn’t start with a repair at all — they should start with a diagnosis. Published repair techniques are a partial guide and may not fit every condition, and the safe move when in doubt is a qualified professional look. That’s especially true when:
- Multiple holes or widening cracks appear across the same wall, suggesting a structural or moisture cause rather than isolated impact damage.
- The damage sits near flashing, windows, or roof lines where the drainage plane is doing critical work.
- The building is old enough that the stucco may be lime-based or a mixed history of past patches.
- There are already signs of water intrusion: efflorescence, blistering paint, or soft or stained material inside the opening.
Recommendation: if any of those apply, price an assessment before pricing a patch. Fixing the visible hole without finding the water path just resets the clock on the damage.
Head Into Wet Weather With a Sound Wall
The payoff for assessing stucco holes early is straightforward: you choose the repair on your terms. Hairline cracks get a modest flexible-filler fix, real holes get a proper cut-and-patch with the lath and building paper restored, and walls with a bigger story get diagnosed before money goes into the wrong repair.
If your building in the Northern San Francisco Bay Area has holes, cracks, or damage you’d like evaluated before the rains return, One Stop Plastering (CA license 973914, bonded and insured) handles residential and commercial stucco repair, waterproofing, and leak detection services and can help you choose the right fix for your wall.