
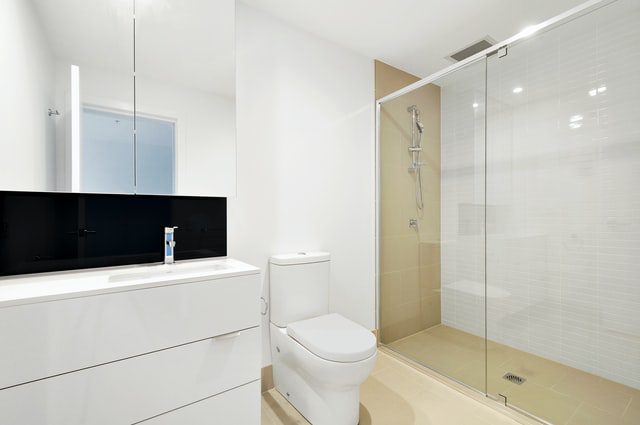
Knowing that plasters need to dry to fully set and harden, many people wonder if the material is useable in showers. In short, they certainly can be! In fact, many people use plaster finishing for the most aesthetically pleasing shower room around. While they are an option for any bathroom renovation, this does not mean there is not any challenge in using plasters for shower rooms.
Fortunately, there are various solutions to overcome these challenges, and in this article, we will list down what you will need to do to ensure you can properly apply plaster in your showers.
Waterproof the fixtures
Before applying any plaster, you will need to waterproof the fixtures. Do this by applying a waterproof membrane to ensure water does not seep into the fixtures and wreak havoc. Note, however, that you should not apply plaster directly on a waterproof membrane’s surface. This can lead to cracks that do not eliminate the problem.
Apply the plaster on tiles/waterproof membrane
Once you have applied the waterproofing membrane, you can start applying the plaster on the tiles and the waterproofed areas.
If you want to apply plaster on the waterproof membrane, start by coating the surface with a fiber-reinforced plaster. After it dries, apply a polyester mesh on the tap and handle area, fixing it into place using the same fiber-reinforced plaster. Only after that is also dry, apply the same mesh on the entire shower wall, keeping everything in place with the same previously-mentioned fiber-reinforced plaster.
When applying plaster on tiles, fill any gaps to create a flat surface using a non-shrinking adherent substrate. This is important because a flat surface is not only beneficial for the plaster application, but the non-shrinking and adherent characteristics of the substrate ensure the plaster does not crack and stays firmly affixed to the substrate.
Apply the plaster finish and waterproof the walls
With the previous step done and dusted, you can apply the plaster finish. You will want to use a smooth plaster for this job, simply because any coarse plaster creates tiny crevices and spots where moisture and other organic compounds can hang around. This can lead to problems like wet stains and even mold growth which can hurt the aesthetics of the shower room. Also, apply some form of waterproofing to the surface to further protect the surface. You can do this by applying two coatings of universal primer that’s diluted with water at a 1:14 ratio, followed up with two to three coats of polyurethane varnish
Apply the silicone seal
For areas of the shower room between your shower walls and shower try, to be sure to apply a silicone seal. Be sure to use anti-mold silicone that helps to waterproof the shower room even more and addresses mold growth so that you do not have to deal with the insightful and dangerous growth.
Conclusion
In summary, you can apply plaster in your shower room, and the above steps should help you do so successfully. Just keep in mind to take your time and complete the project carefully, as any steps missed will not only waste a lot of time to fix, but it can end up costing you a lot of money as well. In the case that you are unsure of what to do or need help, be sure to reach out to plastering experts to do the job for you. They will take into account your needs and create an actionable plan that will turn your shower room into the room you have always dreamt to have in your home.
One-Stop Plastering offers residential and commercial stucco and plastering services in the Bay Area, covering exterior plaster and stucco, fireplaces, concrete and plaster walls, and various other services to satisfy any needs. Reach out to us today to have your home’s plastering needs fulfilled!

