
Plastering is an art that can add an exquisite finish to your home, especially when you start dealing with concrete and plaster walls. In any case of home design, plastering must be conducted with precision and care to end up with a beautiful finish. The process of plastering for these materials isn’t that arduous, but it’s easy to mess up if you ignore the fine details.
While a professional service that conducts finishes for concrete and plaster walls can undoubtedly do the job with ease, you can actually give it a try on your own. It might take a little more time and effort on your end, especially if you’re doing it alone, but it is possible to run a plastering DIY craft. Here are the various stages of running a plastering procedure for walls if you plan to do it on your own:
The Primary Coat
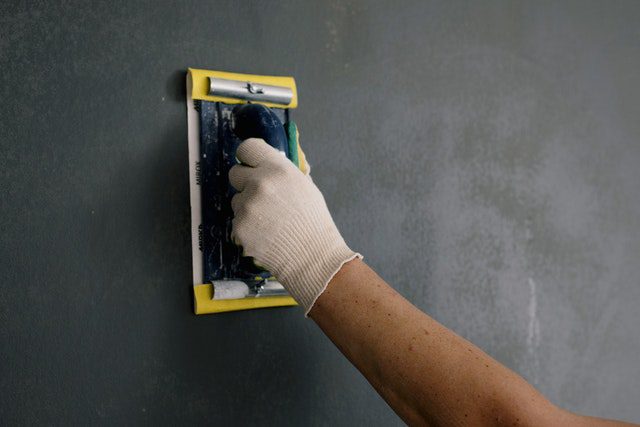
Like all home finishes, plaster requires a layer that acts as a primer. You’ll want the first layer to be around two millimeters thick, and start loading it at an angle leading the edge of the trowel away from the wall. Use long strides and gradually flatten it to give it a smoothened finish with no bulges and bubbles but having some ridges and lines is expected.
Push Out Bulges
Your plaster will begin to harden, which means that flattening out the bulges on the first coat with a cleaned out trowel will help you smoothen out the pressure built up. Move your trowel across the wall with movements with long strides with the leading edge around 10 millimeters away.
Applying the Second Coat
Plaster applied on the second coat should only contain half of the material used on the first run. Thickness is supposed to be half at one millimeter, with a run that has more pressure applied to reduce holes in the material. Any remaining holes will be resolved in the next steps, so keep moving forward with the procedure to ensure that the plaster doesn’t dry unevenly.
Flatten the Plaster
Flattening the plaster to remove any holes will ensure that the final finish will look incredible. At this point, you’ll want the material to be tacky and have a pliable nature that can be moved around holes. However, ensure that it isn’t wet enough to create more. Remember that the angle of the trowel matters, and this will reduce the risks of scrapes and damages. Pressure can be firmly applied, but don’t worry too much about lines and ridges. The priority of this step is to remove all hole sizes on your plastered wall.
Remove Ridges and Lines
Using your trowel, remove the ridges found in the plaster coat, as these are inevitable in the process. You can scrape off ridges with some force, but don’t overdo it because the plaster might come off with them.
Surface Polishing
You’ll have an excellent surface after following these steps, making it high time for a good polish by running the trowel firmly over the entire wall. This method gives off a good finish that looks smooth and exquisite, which looks lovely for any home being built.
Conclusion
Having concrete and plaster walls done can be difficult, but the process of plastering can be easy if you have the time and patience to run the steps for each area. While you might save some money doing it yourself, the time spent can be used for other endeavors, which is why leaving the procedure to professionals is the best option.
One Stop Plastering offers premium concrete and plaster wall solutions in the Northern San Francisco area. With various plastering services, window replacement, waterproofing, and fireplace construction, we can build a house fit for your needs. Contact us to learn more about how we can be of assistance.
